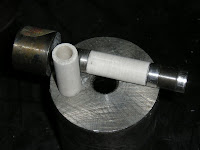
 Before I show you how I do that, I'll give you a brief review of our experimental apparatus: The experimental powder is sealed into small (2 mm diameter) gold capsules, which are placed into holes drilled into plugs of MgO (which looks just like a piece of white chalk for a chalk-board, but it contains magnesium instead of calcium). The MgO plug and its contents are placed into graphite cylinders (which we purchase), and the entire package is then put into cylinders of salt. Finally the salt and all of its contents are loaded into a large metal container and placed into the end-loaded piston-cylinder machine, which is what creates the high pressures necessary for our experiments.
Making the salt cylinders is actually kind of fun—it combines classic “science” moments, like using a high-precision scale to measure the ingredients, with serious power tools.

The reason for the blend is so that the different sizes of grains will permit a closer packing than would be possible if everything were exactly the same size. (Try comparing how tightly one can pack marbles or beans into a glass jar if one uses only one size, or two noticeably different sizes). After I carefully measure the requisite amount of salt (just over 5 grams total for these cylinders) I assemble the mold.

After carefully spraying all parts with a Teflon lubricant, the outer cylinder is placed upon a metal washer upon a sturdy metal platform. Then the small end piece is placed inside, and the steel shaft is placed within that. I then fill it with the salt, using a small rod to tap it down around the shaft and be certain that I’ve eliminated any large air pockets. Once all of the salt is between the outer cylinder and inner shaft, and has been brushed off the end of the shaft the two-part end piece is added to the top.
This is where the power tools come in. Human strength might be enough to push that end piece part way into the hole between outer cylinder and inner shaft, but it would never be enough to cause the salt to recrystallize and adhere to itself and become a single, cohesive mass. Therefore I place the metal platform upon which the filled mold is standing onto the base of the hydraulic press and very carefully align the mold with the pressure rod.


I then carefully align that smaller end piece with the pressure rod, close the door, and engage the motor to drive the rod down onto the end piece, which pushes the salt from the other direction into the center of the mold. I hold the motor on until the end piece is fully inserted and the pressure dial just starts to rise due to the resistance it is now encountering. Stopping the motor before there is too much pressure is critical—it is possible to do major damage to the mold or the machine (or both) by ignoring the gauge and continuing to apply force after the goal has been achieved.
The salt cylinder now exists, but it is caught fast within the outer cylinder, as are all of the other parts of the mold.

The cylinder is now nearly ready to use.
While the lathe is turning I carefully use a small bit of sand paper to polish the outermost layer of salt off of the cylinder, stopping my work often to check to see if it fits yet.
If I were to sand off too much, I’d need to start the whole process over.


No comments:
Post a Comment